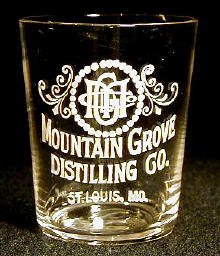
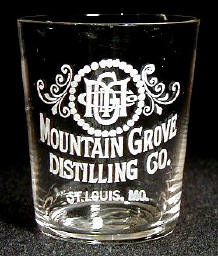
copyright Ken Schwartz, 2006
The second issue relates to color cast. I recommended using halogen lamps not only because their output is intense, but also because the color of light emitted by halogen bulbs is closer to daylight than light from a tungsten incandescent. As mentioned above, we perceive daylight as white but in reality it's a mix that spans the color spectrum from red to violet. Common household bulbs emit light that is weak in the blue-violet range. The intensity of the light is such that our visual cortex ignores the predominance of orange and red and interprets it as white, yet the strength of the hue is readily apparent when one records it on film or a monitor. The Bull Dog shot glass from Bowen, Goldberg & Co. in Figure 9 is a classic example. This wonderful glass from San Francisco was photographed on a field of black, but an incandescent bulb has rendered it muddy. To my mind, the warm background does nothing to detract from its appeal, but it is something to be aware of.
| Figure 9. copyright Ken Schwartz, 2006 |
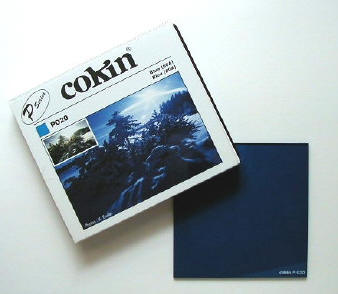
It is possible to anticipate and correct for color shifts using specially-designed filters. One example is shown in Figure 10: they're inexpensive and easy to obtain online or from a local store: just hold it close to the camera lens when snapping photos.
| Figure 10. A Cokin P020 correction filter that adds blue into the color mix of light given off by artificial bulbs, creating a more natural palette. A range of different hues are available that complement most light sources at modest cost. |
 |
Figure 11 provides a pictorial summary of how a pre-pro glass is rendered by standard lighting, after turning on the halogen desk lamp, and with the inclusion of a color correction filter.
 |
 |
 |
Figure 11 A single glass presented under three different lighting conditions. The first image (left) was created in an everyday setting. Light sources include an overhead fixture with 6 incandescent bulbs, plus muted light from two side windows. While the label is sharp and clear, the glass is bouncing back reflections from multiple sources in the room. The center image was created after a halogen desk lamp centered over the glass was turned on. The reflections have been banished by the intense light, thereby providing excellent contrast between label and background. Unfortunately the glass looks sickly with a muddy reddish-green pallor. Inserting a color-correction filter between camera lens and glass removes the caste and the black felt background is now reproduced faithfully. |
||
Exceptions to the rule.
While the techniques described above will suffice for 95-98% of your collection,
there are two groups of glasses that don't give of their best when photographed
against a dark background.
The first includes picture glasses in which the applied image was been rendered in
negative. There aren't too many of these, fortunately, but the Old Bard shown in
Figure 12 is a classic example. It's clearly a wonderful glass in the
white-on-black version (left), but figure holding the shield doesn't seem right. It's
only when the label is observed against a white background that we understand why: it's etched as
a negative . To create the photo at right, I waited until
the sun was shining directly into my home office window and then photographed
the glass against a blank piece of printer paper.
| Figure 12 | |
 |
 |
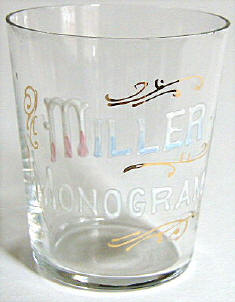
The second group includes the rare enamel glasses. Enamel labels were hand-applied as
thickly as toothpaste, often being embellished with delicate pastels and garnished
with hand-painted gold curlicues. The labels are so dense that they bounce back any
light falling on them, causing a glare that smothers texture and
bleaches out pastels [Figure 13, left]. In order to show these glasses at their best, we have
to provide a bright background that competes with the intensity of the enamel. A white background illuminated by soft natural light seems to work
well in such cases [Figure 13, right].
| Figure 13 | |
 |
 |
Digital fixes
One of the supreme advantages to working with a digital camera is that we have
the ability to download images to the computer hard drive and then manipulate
them with the appropriate software. Contrary to what you might think, however,
skill with a mouse is no substitute for good photographic technique. Images that
are ruined by motion cannot be corrected, so you're still going to
need the tripod. Colors can be adjusted to compensate for artificial lighting,
but only with difficulty and the results never seem quite real. Indeed, while I
do have the full version of Adobe Photoshop installed on my computer hard drive, all I ever do
to my shot glass photos is crop them and resize them using a very basic program that came
with the camera. Bottom line is that if you're prepared to spend a little time adjusting camera and lighting
angles, you'll find that pre-pro glasses are so photogenic that they
almost click the shutter for you.
Happy hunting!
Footnote: In the previous issue, I showcased a selection of images notable for their photographic errors. In the interests of fair play, I'd also like to pay tribute to the talents of the many individuals who support their auctions with truly outstanding photographs of shot glasses. The images in the title bar [Figures 1 and 2] were both taken from eBay listings and are as good as it gets anywhere. For more details on how they were created, please visit www.pre-pro.com. I'd also be interested to hear and share any tips you might have on Shooting Shots, so please drop by and leave comments in our chat room. Thank you!
Robin is an enthusiastic collector of shot glasses and maintains the collector’s website www.pre-pro.com. He can be reached at 245 N 15th St., MS#488, Philadelphia, PA 19102, e-mail oldwhiskey@pre-pro.com.
[ Turn Back a Page ] [ Back to Random Shots Index ] [ Turn Back to First Page ]